Precision Workspace Design: Alignment of Canvas Objects in FME 2018.1


 With FME2018.1 now available, I wanted to do a brief post about object alignment on the FME Workbench canvas.
Why? Because we made a small change that may help when you are – like me – a workspace design perfectionist!
But first, let’s look at what I mean by alignment and why you should care…
![]()
Why Align Objects?
We all know that workspaces look better when they are properly organized. In fact a favourite saying at Safe is:
“A good looking, well-organized workspace gives the customer the feeling that you have done quality work.”
Part of a good looking workspace includes aligning objects such as transformers on the canvas.
I hope you’ll agree that this…
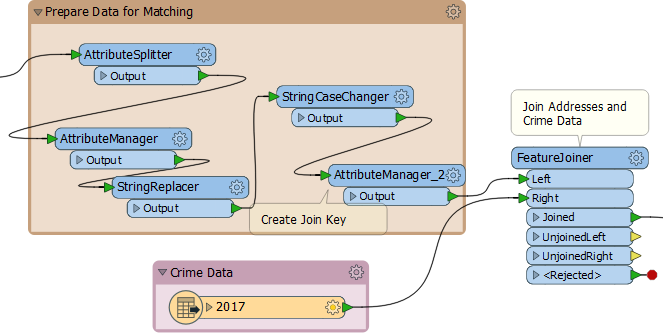
Is much improved with simple alignment:
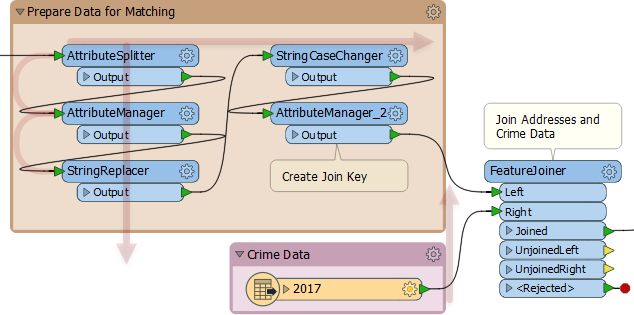
Each column of transformers is aligned down the centre, each row is aligned across the top, the transformers are evenly spaced, and the two bookmarks aligned on the right-hand side. Also – although you may not notice – the top of the FeatureJoiner is aligned with the top of the StringReplacer, and the “Create Join Key” annotation is also aligned within the column/row layout.
It looks like a lot of work, but it’s not actually that hard to create this layout…
![]()
How to Align Canvas Objects
We align objects on the Workbench canvas by selecting them and choosing an option from the toolbar, or the context menu (menus edited to reduce screenshot size):
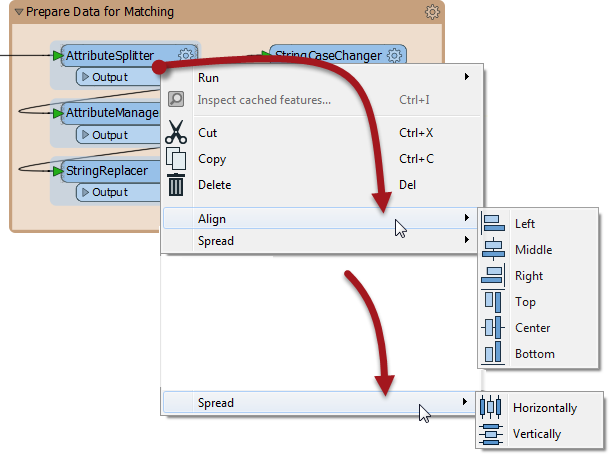
Since the three selected transformers are in a column, I use either the Align Left, Middle, or Right option to line them up. Then I’ll use the Spread Vertically option to space them evenly.
I repeat the process on the second column, and then work on the rows of transformers, using Align Top, Center, or Bottom for the alignment and Spread Horizontally for spacing.
Notice that it’s not just transformers; I was able to use the same align tool (Align Right) on the bookmarks.
To avoid using the context menu all the time, you can add shortcuts to the toolbar (Tools > FME Options > Toolbar):

The right-hand option, by the way, is Auto Layout; but I rarely use that because… well, I guess I’m a GeoHipster who likes to hand craft his own artisanal workspaces!
Anyway, we can align objects this way. But how do we pick the “key” object?
![]()
Key Object Alignment
What is a key? Well think of alignment in the same way as a snapping operation using the Snapper:

The two lines need to snap here, but there is a choice of which line stays in position and which line snaps to it. If it’s important you’d use an AnchoredSnapper to anchor one of the lines.
The same thing applies to layout tools in a graphic interface like Workbench. Should transformer A align to transformer B, or should transformer B align to transformer A? What is called an “anchor” in snapping is called a “key” in a graphic interface.
So how do I select the key in FME Workbench? There are two ways. The first method is to select the context menu on the key object:
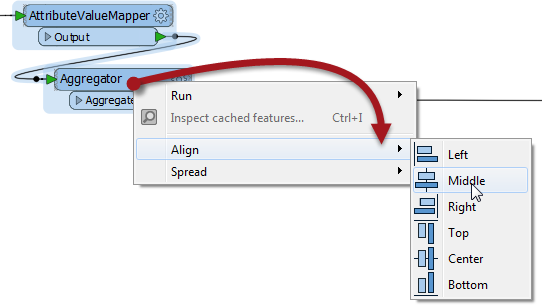
So here, because I right-clicked on the Aggregator transformer, it becomes the key object and the AttributeValueMapper is the transformer that moves:
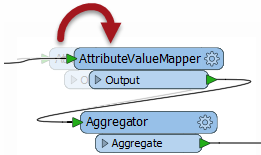
That capability has been in FME for a while now (did you notice?) but what’s new for FME 2018.1 is what happens when you use the toolbar button.
When you use the toolbar to align objects, then you can’t click on the key object. Instead, select each object in turn, ensuring that the key is last to be selected. So if I want to align these objects within the bookmark, I click (or ctrl+click) in the numbered order:
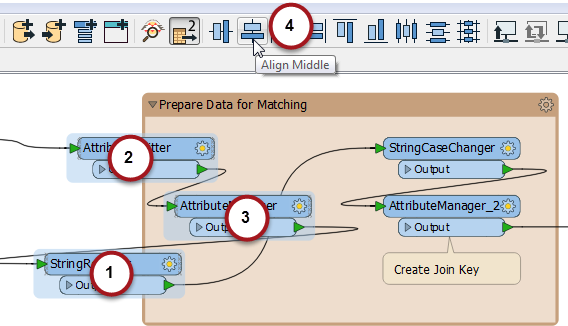
Then FME aligns transformers 1 and 2, with 3 as the key:
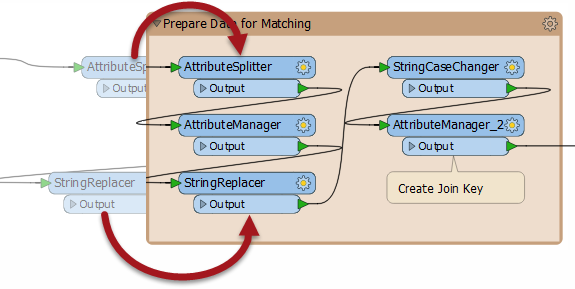
If I’d selected the StringReplacer last, then the other two transformers would have moved left to align with it.
If you’re smart you might now be pondering how to choose the key when you select objects using an envelope selection. That would be a two-step process. First you envelope all the objects, then you ctrl+click on the key object twice (once to deselect it, once to select it again). It’s not great, but I can’t see another way.
![]()
Alignment Summary
That was a lot of blog just to cover one small update but, of course, most of the reason was to cover object alignment in general. Also, little of this is necessary if you build the workspace use Grids and Guides to align the objects during construction.
But if you inherit a workspace that isn’t properly organized, or you want to align multiple objects at once, then the alignment options are a great tool to be aware of.
I hope you find this update useful. When you’re a precision workspace designer, sometimes it really is the little things that matter.


